What are Autoflowering Crops? [Characteristics and Types]
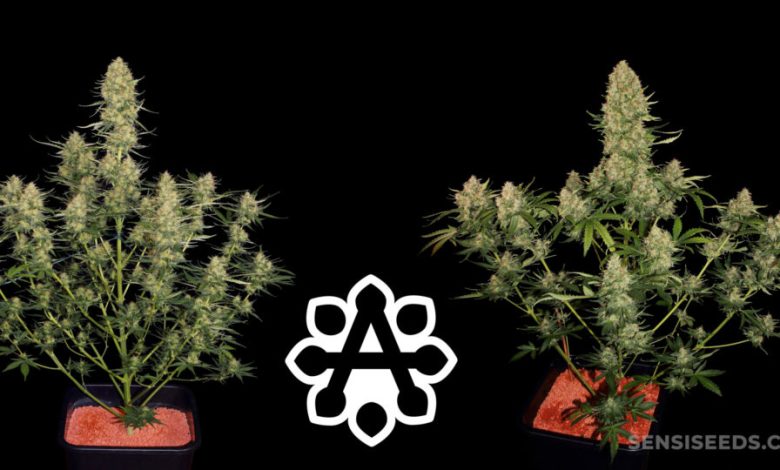

When starting a home grow from any seed, the grower must assess what type of seed is suitable. Feminized and autoflowering seeds are sold on the market.
Each of them has some characteristics and peculiarities that make them the ideal option for cultivation, explains GB, a company specializing in online seed sales.
What is the difference between them?
What are the advantages of autoflowering crops?
Here we tell you!
Autoflowering cultivars or feminized seeds: Differences
In the world of seeds, you can find male seeds or feminized seeds.
The former generate an abundant production of seeds with a low level of THC. However, their pollination capacity is so high and uncontrolled that they are hardly used.
Since the end of the 1990s, the industry has developed so-called feminized seeds that guarantee the cultivation of female plants. However, they depend on the so-called photoperiod for flowering and harvesting.
For those who prefer crops from seeds all year round, it is recommended to go for autoflowering crops.
Also called autoflowering or automatic seeds, they are a variety of cannabis seeds that flower automatically according to their age, but not depending on the hours of light they receive, explains GB.
Hence, there are more and more growers interested in this modality, even sacrificing some production. It is especially recommended for beginner growers or those who do not have time for the care required by feminized seeds.
Characteristics of autoflowering crops

To understand how autoflowering seeds work, you have to dig into their origin.
This is identified with extreme climates such as the frozen wastelands of Siberia. Hence, it is a highly resistant plant to external factors that usually affect crops.
Autoflowering crops are also less demanding in terms of cultivation tasks. It will be enough to maintain the sufficient light that they need to grow, without being aware of the changes of season.
They are especially recommended for climates with harsh conditions and short, cool summers.
Finally, their complete life cycles are faster, between 60 and 90 days. Due to this rapid flowering, autoflowering crops generate more production per year for the grower.
Although at the individual level, the production is lower than feminized seeds.
Indoor and outdoor autoflowering crops
One of the great advantages of using autoflowering seeds is that they can be grown both indoors and outdoors.
Indoor autoflowering cultivation, nuance GB, has in its favor that it allows cultivation at any time of the year, without depending on the weather, rain, or winds. Nor from space, since autoflowering plants do not reach great heights.
But it does depend on the light it receives, since it will require 18 hours a day.
Autoflowering seeds for outdoors do not require the installation of bulbs. In fact, these plants usually require fewer hours of light to flower.
This implies significant energy savings, and in the budget.
At the same time, by not having a closed space, there is no investment in ventilation or moisture extraction systems. As in the interior, they hardly reach height, so they can be kept away from the curiosity of the neighbors without attracting their attention.
Its biggest disadvantage lies in its exposure to pests and insects.
Guide to growing autoflowers

As we have seen, autoflowering crop varieties offer results in unusual times when working with other seeds. From seed to harvest it takes between 8 to 10 weeks.
However, GB advises to find out exactly what specific variety you are going to opt for, since there are seeds that do not reach full maturity until week 12.
For example:Bubble Kush Automatic strains are generally faster growing than Royal Creamatic.
The lighting program
Although autoflowering seeds are characterized by the fact that they do not need a change in the light cycle to flower, it is common for growers to opt for a standardized lighting program. The most common is to use the 18-6 method: 18 hours of light for 6 hours of darkness.
Is it appropriate to keep autoflowering plants permanently illuminated?
GB explains that in reality, even if photosynthesis is maximized, the production-cost relationship is not profitable.
Autoflowering Seed Growing Calendar: Step by Step
How to get a good harvest? GB explain how to plan a weekly calendar so that plants grow healthy, strong and productive.
Thus, during the first week, germination must take place, which takes between 1 and 3 days. In this time, the seeds develop a root below the ground and a beginning of shoot on the surface.
For germination to be successful, it is important to prepare the soil well, make it light and oxygenated. In the market there are soils already prepared to proceed with planting in a pot, although you can also choose to make a homemade soil for autoflowering crops.
In this phase, the environmental conditions are decisive: they must maintain a relative humidity of between 70 to 90 percent and a constant temperature of between 22-25 degrees.
The second week corresponds to the seedling and vegetative phase, in which it is advisable to start using growth enhancers to optimize resources, always measuring the proportions corresponding to the exact strain being grown.
During the third week, as long as the optimal conditions are maintained (light at least one meter from the plant, half a liter of water a day, 50% humidity and 20 degrees of ambient temperature), new leaves will emerge.
After this time, and entering the end of the first month, the plant will be ready for flowering with a small adjustment in the conditions.
Usually, this flowering is observed during the fifth week. Small sacs with hairs are formed on the plant at the node. Be careful, because these protuberances will be the resinous buds in the immediate future.
It will be the right time to change from a white light to a red one. Why? The spectrum stimulates their growth.
From the sixth week it would be the point at which the flowers multiply. You have to watch the form they take to identify hermaphrodite plants, as they will try to pollinate themselves.
These specimens must be eliminated quickly so that they do not spoil the crop. In the following two weeks, in addition to careful monitoring of the conditions required for each phase, it will only be necessary to observe when the buds get the resinous and thick appearance that marks when it can be harvested.
At the beginning of the eighth week, or ninth if it has not grown as much as expected, the roots are washed and subsequently defoliated. For beginners it is recommended to practice the technique beforehand. Finally, in weeks nine and ten, the signs that indicate that the harvest is ready are perceived: the buds are ripe.
Finally, once the buds have been harvested, the product is dried and cured.


![Photo of Tuta Absoluta o Polilla del Tomate: [Cómo Identificarla y Combatirla]](https://www.complete-gardening.com/wp-content/uploads/2022/08/tuta-absoluta-o-polilla-del-tomate-como-identificarla-y-combatirla.jpg)
![Photo of Flowering Plants: [+72 Examples and Characteristics]](https://www.complete-gardening.com/wp-content/uploads/2022/08/flowering-plants-72-examples-and-characteristics-390x220.jpg)
![Photo of The [15 Best] Durable and Hardy Houseplants](https://www.complete-gardening.com/wp-content/uploads/2022/08/the-15-best-durable-and-hardy-houseplants-390x220.jpg)