[13 Steps] to Grow Tomatoes: Everything You Need to Know
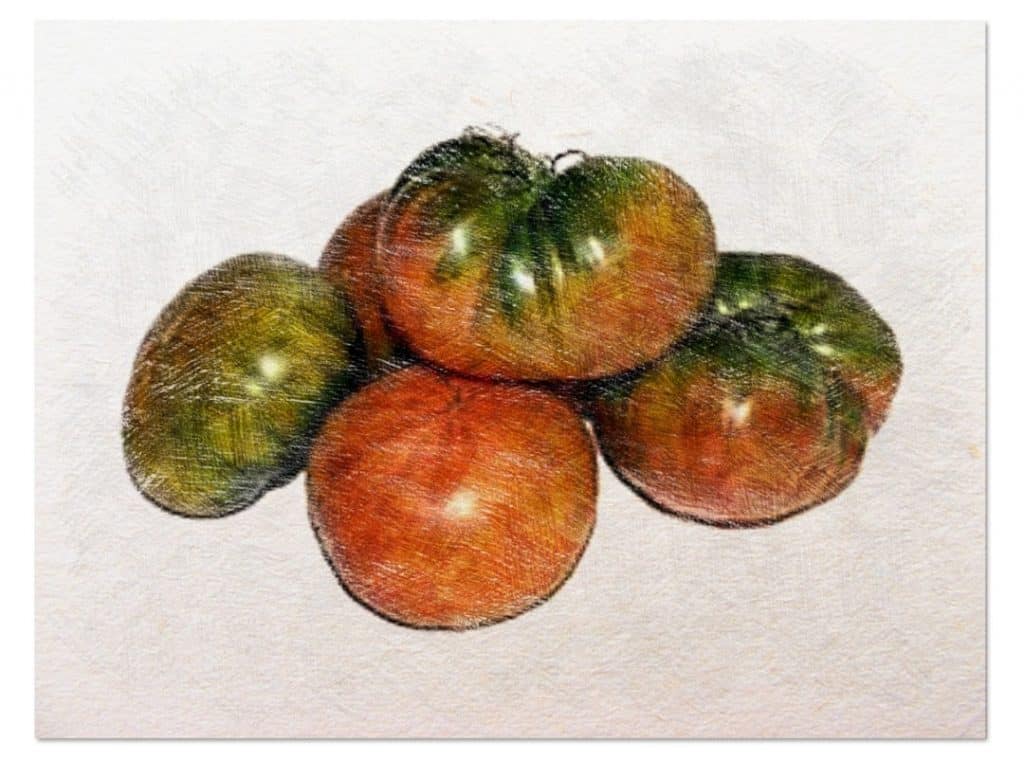
The tomato is one of the most consumed fruits by humans throughout the world.
As you know,can be used for:
- make salads
- Make stews.
- make sauces
- And many more things…
It is tremendously nutritious and… you know what?Its cultivation is not complicated at all.Although yes, you must take into account a series of important things to get the most out of it.
How to Plant Tomatoes Step by Step:
- When? Spring.
- Where? In a place with maximum sun exposure.
- Harvest time? 2.5 months.
- How do we prepare the land? Ideal plowed, soft and well-draining land (motor tiller).
- Distance between seeds? Between 40 and 60 cm.
- Substrate and fertilizer? Animal and vegetable.
- How do we start? With seeds (greater difficulty) or seedlings (easier).
- Ideal irrigation option? Drip.
- How often do we water? Daily or every two days (depending on the heat). Between 30 and 60 minutes (depending on the heat).
- Which requires? Drained land and lots and lots of sunlight.
- What do we plant next? Onion, garlic, lettuce, carrot, nasturtium and broccoli.
- What should we NOT plant nearby? Potatoes and cabbage.
- What common diseases do you have? White fly, mites, fungi, red spiders.
How to grow tomatoes step by step
Step 1: Buy certified seeds
Start by buying certified seeds or even take some of your tomatoes (for them we recommend that you do not wash the seed, just dry it a little with absorbent paper and plant it directly.
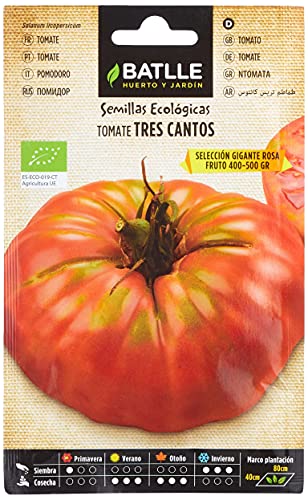 Batlle Tomato Seeds Three Edges Giant Pink – ECO
- Medium cycle plant, with round pink fruits
- Sowing from December to March
- In the nursery, transplant when the plant has 3-4 leaves to a frame of 40 x 80 cm
- Harvest from 4-5 months
€1.76 View on Amazon Prices with VAT without transport
Last updated on 2022-07-30 / Affiliate Links / Affiliate API Images
Step 2: Prepare a seedling or pot
Prepare a nursery or use some recyclable containers, such as egg cartons, small clean plastic pots, or bottles cut in half.
Just make sure they are clean and have holes for drainage.
Step 3: Buy quality substrate
Buy a good quality substrate, ask about its properties and evaluate your options.
We can recommend you to buy this on Amazon. The substrate is extremely important when it comes to maximizing our tomato production.
Suinga. 4 bags of 70 liters UNIVERSAL SUBSTRATE PREMIUM FLORAGARD. Peat bags used for lawns, pots, plants, gardens. Considered the best substrate on the market
- UNIVERSAL SUBSTRATE. Pack 4 bags of peat 70 liters of PREMIUM QUALITY
- For indoor plants, balcony or terrace. Vigorous and robust plants thanks to the valuable natural guano fertilizer
- With Aqua Plus for optimal water absorption. Premium fertilizer for healthy and long-lasting plant growth
- Nutrient supply according to needs thanks to the balancing effect of the clay. Recommended to use with abundant…
€89.95 View on Amazon Prices with VAT without transport
Last updated on 2022-07-30 / Affiliate Links / Affiliate API Images
Step 4: Place two seeds in each container or pot
Place at least two seeds in each container, you can plant it not too deep (one centimeter deep is more than enough).
Step 5: Lightly moisten the substrate
 Moisten the substrate slightly (do not drown the plant) and cover the container with plastic wrap to prevent moisture from escaping too quickly.
Then you can find a convenient space in your home, where you can check it frequently (it is not necessary to hit a lot of light at this point), take care that the substrate is kept moist.
Step 6: About 8-10 days to see the first shoots
After about 8 to 10 days you will be able to see the buds, at this point you should place the plants in a spot with a lot of light (taking care of cold currents) or use light lamps near them (about 5-10 cm away)
If the two seeds you placed at the beginning are born, evaluate which is the strongest and cut the other (A little cruel but necessary!).
Step 7: Maintain Steady and Moderate Water Flow
Keep the flow of water moderate (don’t drown them but don’t let the substrate dry out). One of the best ways to water tomato plants is by drip irrigation.
The drip manages to drain enough water to the roots but without flooding them. In addition to that we can save a lot of water.
No products found.
Step 8: After 6-8 weeks…
After 6 or 8 weeks and when the cold is gone ( or in case you live in a Tropical climate, you just hope your plants are a good size) you can place your plants in the space where they will eventually grow.
You don’t need to transplant them yet, but they do need to get used to their new space, you can start in the sun hours of 2 to 3 hours a day.
Step 9: The cold has passed
The cold is gone! Your plants are already a good size, after eight weeks you can transplant them to their final site.
Step 10: Clear the ground
Clean the land of weeds. If you have a motorized cultivator or motorized tiller, it is ideal to plow the soil well, so that it is loose and drains properly.
MADER GARDEN TOOLS – Motorized Tiller – Mechanical Plow – 3 speeds – 7HP – with accessories – with oil sensor!
- Power: 4t explosion, 210 cc, 7hp, 3600 rpm, air cooled: yes
- Cutters (reach x depth): 380 x 350 mm x2 (910 x 250 mm), change: «r» + «1» + «2», noise: 86db (a)
- Accessories: adjustable trench openers, strawberries, pneumatic wheel
- Included Components: Motor Hoe with Accessories
View on Amazon Prices with VAT without transport
Last updated on 2022-07-30 / Affiliate Links / Affiliate API Images
No products found.
Step 11: Transplant
Put compost or good substrate in the hole. Make sure to moisten (not flood) said hole and insert the plant you have. Cover carefully, until only the stem is visible.
Step 12: Finally, Straw Mulch + Plenty of Water + Sun
To finish and see our tomato plants grow, make a straw mulch on the ground. This will greatly prevent weed growth.
462 Reviews Stacked straw – 110 x 50 x 40 cm
- Food grade barley straw. Made in Lancashire to the highest quality standards.
- Ideal for horses and other large animals.
- Excellent as a bed for all pets and animals.
- Compressed bale, popular as garden and outdoor seating.
€39.50 View on Amazon Prices with VAT without transport
Last updated on 2022-07-30 / Affiliate Links / Affiliate API Images
Step 13: Drip Water Daily
If possible, twice a day, about 20-30 minutes, if you have a timer. Otherwise, only once about 40 min.
Watering will depend a lot on the ambient temperature and how you see your tomato plants. If you have fallen leaves, increase the daily water flow. It is highly recommended not to flood the soil when watering and not to wet the leaves. Make sure they get a good amount of light daily.
In general, tomato plants are ideal plants to grow in an urban garden.
The reason is that if you have a little space, sunlight for several hours of the day and a few pots you can fill your home garden with tomatoes of all kinds. You don’t need much more than this.
- To find out more, read our guide: Tomato Blooms.
T he tomato is a type of fruit vegetable that is very common throughout the world.
The reason? The enormous possibilities it gives in the kitchen. Practically all cultures use tomato to a greater or lesser extent for cooking; either as an accompaniment, as a sauce or as a delicacy.
In the following article we are going to see in detail how to plant tomatoes and be able to have a good harvest in our garden.
Taking care of a living being, seeing its growth, development and eventually enjoying its fruits cannot be anything less than exciting, and for this reason, it is an activity enjoyed by people of any age, gender and nationality, planting is precisely a pleasure that unites us all (just like eating!).
Control over what we sow guarantees us freedom from pesticides and dubious chemicals applied to our food, opening the healthy window of organic products and their wonderful and enhanced flavor.
There are different types of planting, each with varying levels of difficulty, space, care and climatic needs, but one that many experts will agree is one of the most appreciated: growing tomatoes.
Did you know…There is a tomato inside the Guinness Book of World Records. The heaviest cultivated tomato in history was grown by an American farmer named Gordon Graham in 1986, weighing 3.51 kilograms! Could you break this record?
No products found.
Different origins according to the seed
We can differentiate tomato seeds according to two types:
GMO tomatoes
Known as transgenic or genetically modified.
They are varieties that for many experts, although they have great resistance in their growth and imposing fruits, their flavor can be affected.
More common within agriculture; it might be difficult to get the same results from the first generation in the second.
Hybrid Tomatoes
Although they are often confused with those that are genetically modified, in reality this type of seed refers to plants that are pollinated by varieties other than tomato .
This results in variable characteristics in both the plant and its fruits.
Although they are not difficult to plant and harvest, keep in mind that the fruits and the type of plant can vary from one generation to the next, so they can be a nice momentary experiment.
open pollinated
It refers precisely to those varieties of seeds that come from plants whose pollination has been controlled.
For example in greenhouses where only a specific variety of tomato was found.
And although it sounds like an elegant process, it is possible that your garden plants will end up creating these types of seeds.
Blumfeldt Timberflor Plant Pot, Plant Pot, Easy to Place, No Drainage Hole, Fiberglass, Sturdy, for Indoors and Outdoors, Wood Look, 60 x 50 x 30 cm, Brown
- FOR INDOOR AND OUTDOOR: In the Blumfeldt Timberflor pot shrubs, perennials or flowers have a new…
- JAPANESE ZEN AESTHETICS: The Timberflor planter shows the best side of plants and combines it with an elegant design and…
- GOOD QUALITY MATERIAL: It does not matter if the pot remains indoors or outdoors. The new combination of…
- STABLE AND ROBUST: Despite being a much lighter pot than any other concrete or terracotta pot on the…
€109.99 View on Amazon Prices with VAT without transport
Last updated on 2022-07-31 / Affiliate Links / Affiliate API Images
Hariloom or Heiresses
 They are the queens of the seeds and they get their name from the purity of their production.
Precisely this type of seed is the most expensive and valued, as it represents the existing plants before genetic modification or crosses.
They are supposed to be 100% original specimens of each of the varieties and it is considered that the flavor of the resulting fruits can only be classified as unique.
This variety is precisely the one found in the most important seed banks in the world and how can you imagine, it does not have variations from generation to generation.
It is best that you choose a variety of tomatoes that is common in your region; but also that you like it; Regardless of so many technical aspects, it will be much more motivating to sow those fruits that you are eager to try.
What month is good to plant tomatoes?
We cannot grow tomatoes at any time of the year and in any place.
So when should we plant tomato plants? The answer cannot be clear about it because it depends on where you are.
Tomatoes are plants that do not tolerate cold well.Therefore, temperatures below 10º usually make tomato plants suffer a lot.
On the other hand, they don’t do well in extreme heat either. Temperatures of more than 40º usually burn and dry the tomato plants with relative ease.
Depending on where you are, you will have to do a little planning.
It is generally ideal once spring has entered.Where the heat increases, but does not become suffocating as in summer.
The reason is simple, at the beginning the tomato plants are usually much weaker than when they have already taken root and have climbed enough. So spring is usually a good month due to the ideal temperatures; there is no cold and the heat is not extreme.
In Spain, for example, a good month to start planting tomatoes is usually May or April (if it is hot). June is not bad either.
In other parts of the world, such as Latin America, it will depend on the beginning of spring.
 The organic family garden (CROPS)
- Well, Mariano (Author)
€9.49 View on Amazon Prices with VAT without transport
Last updated on 2022-07-31 / Affiliate Links / Affiliate API Images
How far apart are tomatoes planted?
It depends on the variety, but in general we will leave a distance between 40cm and 60cm. We will make some good ridges and plant the tomato plants leaving a reasonable distance.
Planning is important and not sowing other plants that may be direct competition for the tomato.
See below
How should we prepare the land before growing tomatoes?
the perfect substrate
To know more: How to properly fertilize tomatoes?
Whether you will be planting in a pot or in a small portion of your garden, it is worth it (and this as a general gardening rule)get the best soil possible.
A good fertilizer is leachate.
Use a high-quality fertilizer and find out what the specific needs of the variety you are going to plant are, in this way you will not only guarantee that the plant has optimal growth, but also improve the quality of the color, size and flavor of the fruits.
You can go to a horse stable where they usually have leftover droppings.
Another way to improve the soil in which you are going to grow tomatoes is to use homemade organic matter such as compost from food scraps in your house.
Buy a compost box and see yourself throwing everything that is organic in there. Egg shells, fruit skins, vegetable scraps, coffee grounds, etc.
You can also add iron sulfate if you think the soil is lacking in iron.
All this, after a while, will have considerably nourished a portion of the land, which, added to animal manure, can be a very good combination.
soil with good drainage
Something that tomato plants cannot stand is that the land they inhabit does not drain the water well and therefore they are flooded.
How to correctly germinate a tomato seed
How long does it take for a tomato seed to germinate?
The satisfaction of having a productive plant that you have managed to install from a seed is priceless.The species does not matter because the pride is the same, but today we want to focus on one of the kings of the plant world: the tomato.
Germinating tomato seeds is a task that will give you good results if you follow the proper procedure (don’t be scared, it’s not difficult at all). And since that is what we are going to talk about today, we invite you to join us in the next few lines in which we will not save a single detail.
How long does it take for a tomato seed to germinate?
Tomato seeds will only take 5-7 days to start germinating.They are seeds with a high germination capacity and if they are fresh you will have a greater chance that this process will be as positive as you want.
How is the seed prepared for sowing?
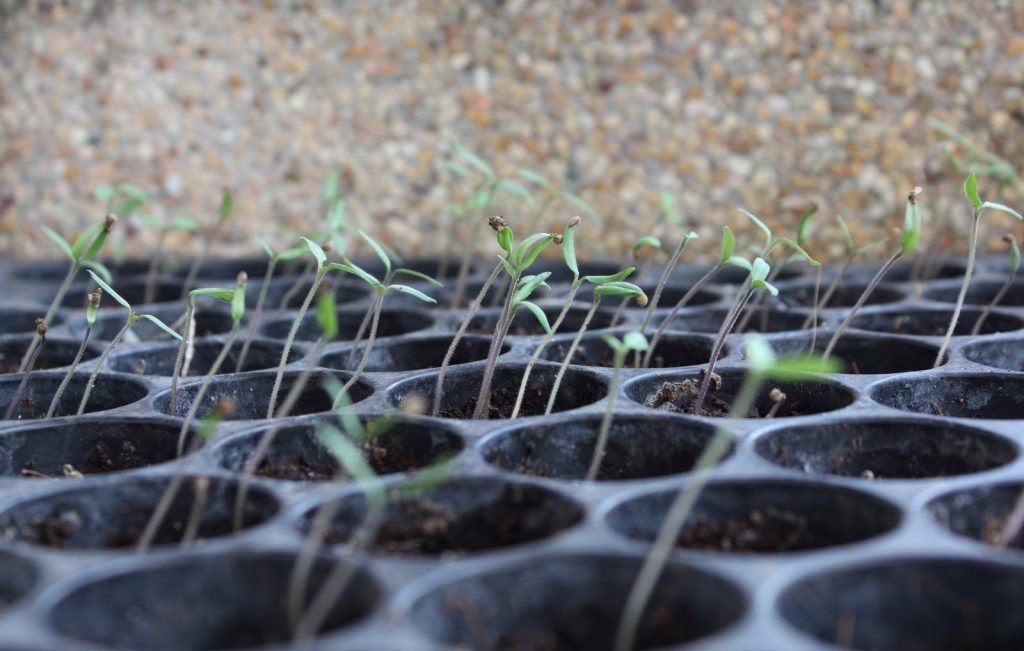
You can prepare the seed from a tomato that you have available, either from your own tomato plant that has given it to you or from anyone in general. To get optimal seeds follow the step by step described below:
- Extract the tomato seeds with the cover they have, which is translucent and gelatinous.
- Immerse them in a glass of water at room temperature for 48 hours. The glass must be glass. After this time, a moldy structure should begin to form on the gelatinous surface.
- Put the seeds in a strainer and start washing them with tap water, trying to completely clean them of the gelatinous coating they had.
- Add them back to the glass of water to determine which ones are suitable for germination. The ones that sink are the correct ones. Those that float try to extract them to discard them.
- Pass the seeds through the strainer again to remove excess liquid and let them dry in a ventilated place.
- Prepare a sheet of absorbent paper, moistening it homogeneously, but without leaving it very soaked, and wrap the seeds with it.
- Place the napkin in a glass container in a more or less warm space that does not suffer from sudden changes in temperature or drafts.
- Wait until the first leaves of the plant appear (it takes between 5 and 8 days) before transplanting to a seedbed so that the root takes more strength. This process must be done within 24 hours after germination has occurred.
With these 8 steps you will already have a properly prepared seed and we will even give you the following steps to achieve effective germination. It is important for you to know that after you have dried the seeds (step 5), you might also decide to store them for future use.
Ideally, you should leave them stored in a paper bag, in a dark and warm place. Remember to mark the bag so you know what the seeds are made of and the date you saved them.


![Photo of Aloe Vera: [Planting, Care, Irrigation, Substrate and Pests]](https://www.complete-gardening.com/wp-content/uploads/2022/08/aloe-vera-planting-care-irrigation-substrate-and-pests-390x220.jpg)

